
Home renovations are exciting—they transform your space into something fresh, modern, and more functional. However, the excitement often ends when you’re faced with the massive mess left behind. Dust, debris, and leftover construction materials can make your home feel chaotic and even unsafe. Knowing how to properly clean up after a home renovation ensures your space becomes comfortable again quickly and safely. In this guide, we’ll walk you through step-by-step methods, tips, and tools to get your home back in order efficiently.
Why Post-Renovation Cleaning is Important
Many homeowners underestimate the importance of cleaning after renovations. It’s not just about aesthetics—leaving dust and debris can have serious consequences:
-
Health Hazards: Construction dust often contains harmful particles, like silica or paint fumes, that can irritate your lungs, eyes, and skin.
-
Safety Risks: Nails, screws, and broken tiles can cause injuries if not removed promptly.
-
Preventing Damage: Dust and leftover materials can scratch floors, ruin carpets, or damage appliances if left unattended.
By taking post-renovation cleaning seriously, you ensure your home is safe, healthy, and ready to enjoy.
1. Gather the Right Cleaning Supplies
Before starting, you’ll need the proper tools. Having everything ready makes the process faster and more efficient. Essentials include:
-
Heavy-duty trash bags and a dumpster or large container for construction debris
-
Broom, dustpan, and vacuum with HEPA filter
-
Mop and bucket
-
Microfiber cloths and sponges
-
All-purpose cleaner and disinfectant
-
Rubber gloves and protective masks
Having these supplies on hand will prevent repeated trips for materials and allow you to tackle every corner of your home effectively.
2. Remove Large Debris and Waste
Start with the most visible and potentially dangerous items.
-
Collect Large Debris: Pick up wood scraps, broken tiles, nails, and screws. Use gloves to avoid injuries.
-
Dispose of Hazardous Materials Properly: Paint cans, solvents, or adhesives should be discarded according to local guidelines.
-
Bag Smaller Waste: Use heavy-duty trash bags for smaller items like packaging materials, plastic sheets, or tape.
Removing these items first prevents injuries and creates a safer environment for detailed cleaning.
3. Dust Every Surface Thoroughly
Renovation dust can settle on every surface, from walls to furniture.
-
Ceilings and Walls: Start from the top, using a long-handled duster or microfiber cloth. Pay extra attention to corners where dust accumulates.
-
Fixtures and Furniture: Lightly wipe all surfaces. If you have delicate items, remove or cover them before cleaning.
-
Air Vents and Fans: Dust can circulate through your HVAC system, so clean vents and ceiling fans carefully.
A vacuum with a HEPA filter can help remove fine dust particles efficiently, reducing the risk of respiratory irritation.
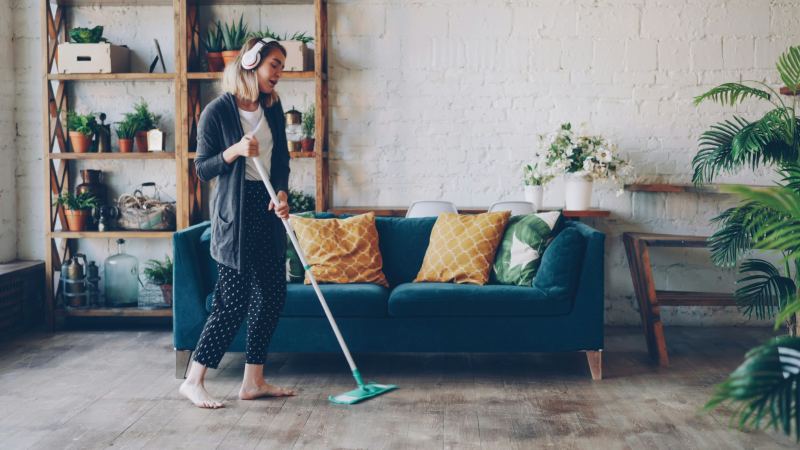
4. Clean Floors Carefully
Floors often take the brunt of construction mess. Different flooring types require different approaches:
-
Hardwood Floors: Sweep thoroughly, then mop using a wood-safe cleaner. Avoid excessive water to prevent warping.
-
Tile or Stone: Sweep, then mop with warm water and mild detergent. Pay attention to grout lines.
-
Carpets and Rugs: Vacuum multiple times, focusing on corners. A professional steam cleaning might be necessary for deep-seated dust.
Cleaning floors carefully ensures that you don’t spread dust around or damage the surface during the process.
5. Focus on Kitchen and Bathrooms
Kitchens and bathrooms often get dusty and grimy during renovations.
-
Cabinets and Countertops: Wipe with a damp microfiber cloth and an all-purpose cleaner.
-
Sinks and Faucets: Scrub to remove dust, debris, and any leftover construction residue.
-
Appliances: Dust and wipe surfaces, especially if they were installed or moved during renovation.
Paying special attention to these areas ensures your home feels clean and functional again.
6. Address Windows and Doors
Renovation dust can make windows cloudy and tracks sticky.
-
Windows: Clean with glass cleaner and a microfiber cloth. Don’t forget the window sills.
-
Doors and Frames: Wipe down doors, handles, and frames to remove dust buildup.
-
Sliding Tracks: Use a small brush or vacuum attachment to clean door and window tracks thoroughly.
Clean windows and doors allow natural light to brighten your refreshed space.
7. Check Air Quality
After renovation, indoor air quality can be compromised.
-
Ventilation: Open windows and doors to let fresh air circulate.
-
Air Filters: Replace HVAC filters or clean air purifiers to remove lingering dust.
-
Dehumidifiers: Using a dehumidifier can prevent moisture-related issues after construction.
Improving air quality helps everyone breathe easier and keeps your home healthier.
8. Dispose of or Recycle Materials Responsibly
Renovation produces a lot of waste. Consider recycling or donating usable items:
-
Wood scraps can sometimes be reused in DIY projects.
-
Metal, glass, and cardboard should be recycled if possible.
-
Donate leftover tiles, bricks, or cabinets to local charities.
Responsible disposal helps the environment and reduces clutter in your home.
9. Final Touches
After thorough cleaning, inspect your home for any missed areas.
-
Spot Check: Look for dust in corners, behind furniture, or under appliances.
-
Polish and Shine: Use appropriate cleaners to give your surfaces a finishing touch.
-
Air Freshening: Natural air fresheners like lemon or baking soda can refresh the home.
These final touches make your home feel brand new and completely renovation-ready.
Tips for Making Post-Renovation Cleaning Easier
-
Clean as You Go: If possible, have the contractor clean daily to reduce buildup.
-
Protect Surfaces During Renovation: Cover floors and furniture to minimize dust accumulation.
-
Use Professional Help for Big Projects: If the renovation was extensive, hiring a professional cleaning service can save time and ensure a thorough job.
Following these tips makes the cleanup process less overwhelming and more efficient.
Conclusion
Proper cleaning after a home renovation is just as important as the renovation itself. From removing debris to improving air quality, each step ensures your home is safe, healthy, and comfortable. By following this guide, you can restore order, shine, and freshness to your home without stress. Remember, careful planning, the right tools, and a methodical approach are the keys to success.
Taking the time to clean properly not only protects your investment but also enhances your enjoyment of the newly renovated space.