
Fast, stable internet inside a home often comes down to one thing: wiring. Wi-Fi keeps improving, but walls, floors, and interference still cause dropouts at the worst moments. Hardwired Ethernet fixes that. It gives desktops, TVs, gaming consoles, and access points a direct path back to the router, with fewer surprises.
Many homeowners start this project after buying a new router and realizing the signal still struggles in certain rooms. Others plan ahead for a renovation and want clean, hidden runs. If the plan includes multiple drops and a long route, and you plan to buy bulk Ethernet cable, read this article to avoid costly mistakes.
Plan the Layout Like a Small Network Project
Start by deciding where you actually need wired connections. A good rule is to wire anything that stays put and uses a lot of bandwidth: a streaming TV, a desktop, a gaming console, or a mesh access point. Then choose a central “home base” where all cables will terminate. This is typically near the modem and router, but it can also be a closet, utility room, or a structured media panel location.
Next, map the cable paths. Walk the house and look for vertical routes between floors, like plumbing chases, HVAC returns, or interior walls that stack from floor to floor. Identify attic access, basement access, and any spots where you can move laterally without drilling through finished surfaces. A rough sketch helps. Mark each room drop, the destination wall plate height, and the likely route.
Finally, choose the cable category for the job. Cat6 is a solid default for most homes. It easily supports gigabit speeds and can handle higher speeds over shorter distances in many setups. If you plan to run near power lines or in high-interference areas, consider shielded cable only if you can ground it properly and install it correctly. Poor shielding practices can cause more issues than they solve.
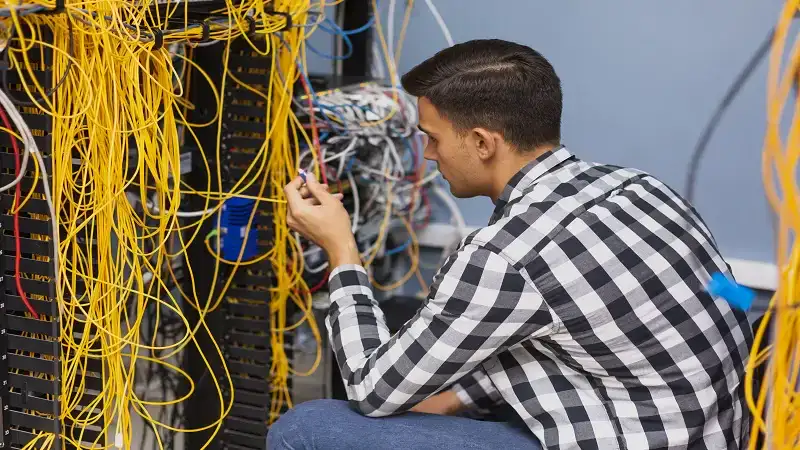
Pick the Right Tools and Materials Before You Start Drilling
Ethernet projects go smoother with the right kit on hand. At minimum, you will want a fish tape or fiberglass rods, a drill with long bits, low-voltage mounting brackets, wall plates, keystone jacks, and a punch-down tool. Add a label maker or masking tape and a marker. You will thank yourself later when you troubleshoot or upgrade.
Do not skip testing tools. A basic cable tester can confirm continuity, correct pinout, and detect open pairs. That catches mistakes early, before you close walls or staple cable runs. If you are wiring several rooms, test each run as soon as it is terminated. Waiting until the end often means redoing work in multiple rooms.
Material choices matter too. Use riser-rated cable for in-wall vertical runs. Use plenum-rated cable only if local code calls for it, such as in return air spaces. Select appropriate low-voltage brackets, not electrical boxes designed for high-voltage wiring. For clean finishes, keystone wall plates make upgrades easier by allowing you to swap jacks without replacing the entire plate.
Route Cable Safely and Cleanly Through Walls, Attics, and Basements
The safest path is usually through unfinished areas. Basements and attics offer room to move, avoid drywall cuts, and create tidy routes to interior walls. If the house has a basement, many installers run cable along joists, then drop down inside wall cavities to each room. In a single-story home with an attic, runs often go up into the attic, across to the target wall bay, then down.
When drilling, aim for interior walls when possible. Exterior walls often contain insulation, vapor barriers, and obstructions that complicate the drop. Drill from the unfinished space into the top or bottom plate of the wall. Then feed a fish tape down to the cutout where the wall plate will go. Attach the cable and pull it back carefully. Slow pulls prevent snags and damage.
Keep cables away from electrical wiring whenever possible. When crossing power lines, cross at a right angle rather than running parallel. Avoid tight bends. Ethernet cable has a minimum bend radius, and sharp bends can affect performance. Do not staple the cable hard. Use low-voltage staples or cable hangers that hold the jacket without crushing it. A crushed jacket can cause intermittent issues that are difficult to diagnose.
Terminate, Label, and Test Every Run Like It Matters
Once the cables are pulled, terminate them consistently. In each room, install a keystone jack and punch down the pairs according to the wiring scheme, typically T568B in residential installs. Consistency matters more than the choice itself. If one end is T568A and the other is T568B, the cable becomes a crossover and may not behave as expected in some setups.
At the central location, decide between a patch panel or direct keystone jacks in a wall plate. A patch panel is cleaner for multiple runs and makes future changes easier. It also reduces wear on the in-wall cable because you connect short patch cords from the panel to the switch. That is a small detail that pays off over time.
Label both ends of each cable. Use a simple system like “Office-1,” “LivingRoom-TV,” or “Upstairs-AP.” Then test each run. Check for correct pinout and confirm you get a clean pass. If you have a managed switch or a router with link speed indicators, verify that the link negotiates at the expected speed. A pass on the tester, plus a proper link at the switch, gives you confidence before you close everything up.
Connect to Your Network Gear and Improve Whole-Home Performance
After termination, connect the runs to a network switch. Many home routers do not have enough LAN ports for a fully wired house, so a switch becomes the hub for wired devices. Put the switch near your modem and router, connect the router LAN to the switch, then patch each room run into the switch.
This is also the moment to think about access points. A wired access point placed centrally on each floor often outperforms a single powerful router at one end of the house. If you already use a mesh system, check if it supports wired backhaul. Wired backhaul reduces wireless traffic and improves stability. It can make video calls smoother and reduce buffering during peak use.
Do not forget power. If you plan to use Power over Ethernet for access points or cameras, choose a PoE-capable switch. It reduces the need for outlets near ceiling mounts and makes installs cleaner. Plan PoE needs early so you do not end up buying new gear after the cable is already in place.
Avoid Common Mistakes and Know When to Call a Pro
The most common mistake is poor planning. People pull the cable first, then realize they picked the wrong wall bay or forgot to leave slack. Leave a service loop at both ends. A little extra cable allows re-termination later. Another frequent issue is pulling too hard and stretching the cable or crushing it with staples. That can cause intermittent failures that only occur under load.
Another mistake is mixing low-voltage and high-voltage practices. Ethernet cable should not share electrical boxes, and it should not run in the same holes as power lines unless code allows it and separation is maintained. Keep the work clean. Use proper low-voltage brackets and route paths that avoid electrical hazards.
Sometimes calling a pro makes sense. If the house has hard-to-access areas, spray-foam insulation, complex multi-story drops, or strict building codes, an experienced low-voltage installer can save time and prevent drywall repairs. A good pro will still follow the same fundamentals: smart routes, gentle pulls, clean terminations, and thorough testing. The difference is speed and confidence in tricky spaces.